Anyways, here's what I've done so far for the (fictional) town of Kemper, Missouri.
 |
| REBEL TATTOO front w/ mural |
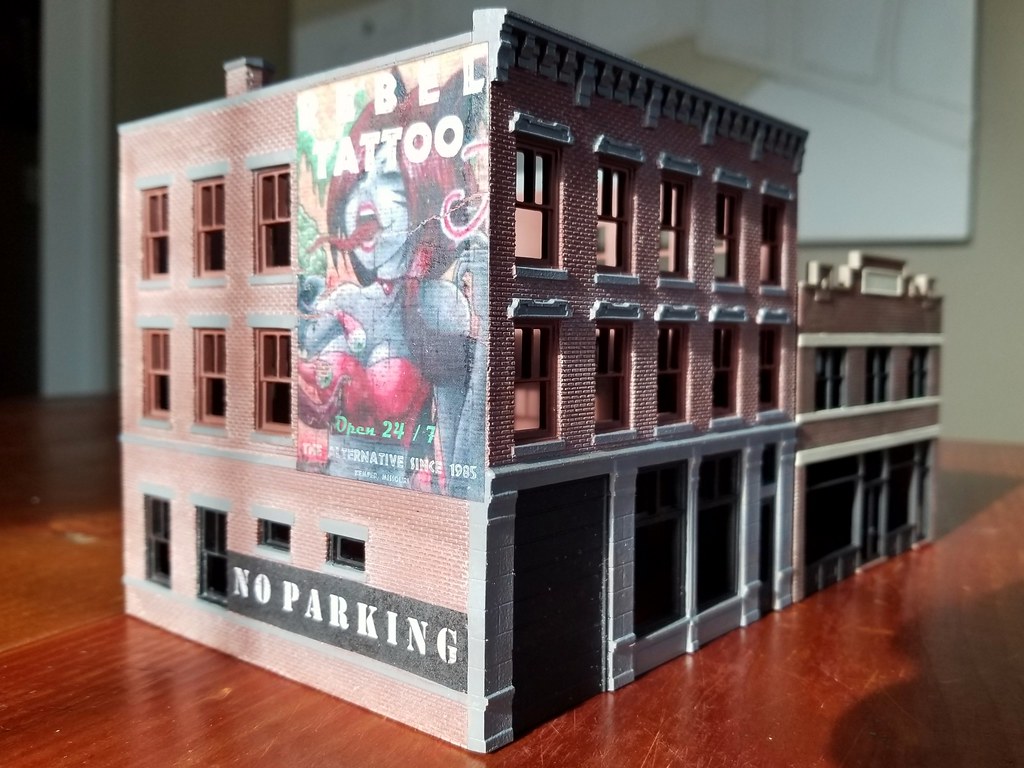 | ||
| REBEL signage |
The tattoo parlor's signage was made using two different methods. "Zombie Girl" above and including NO PARKING were printed on paper using my Laserjet. The paper was then moistened with my fingertip and rubbed away until the image was nearly transparent, then applied with thinned white glue. I don't think I've added any matte finish yet and I'm not too disappointed with how she turned out. There is a slight crack in the paper but it's barely noticeable.

The murals and advertisements pictured above of the "amorous ladies", "Cutty Sark Whisky" and "Bombs Away" were printed on actual decal paper using my Laserjet, then coated with decal film from Microscale and applied as usual. Before printing, I adjusted the transparency on the Cutty Sark advertisement to give it an aged look, too. Weathering will probably tie everything together. I think I'd have a lot of fun in this part of town...
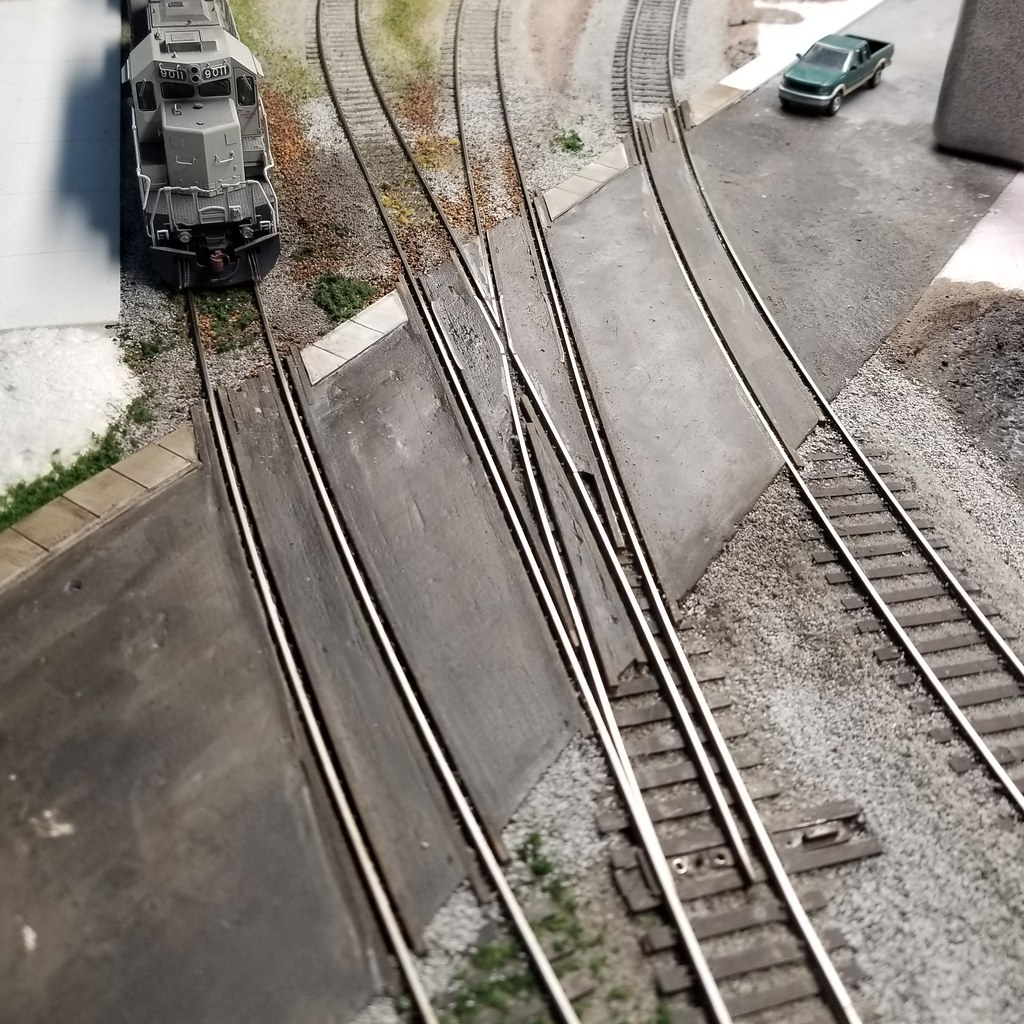
ROAD CONSTRUCTION AHEAD!
How else would they get to the tattoo parlor?
As seen below, this is part of the Kemper Industrial District so I'm trying to get that grungy, industrial look.
 |
| "Street View" |
The pavement is my own blend of setting-type compound (45 minute) and black unsanded tile grout, using 1/16" basswood to form flangeways. I DO NOT use joint compound because of the excessive drying time, so this stuff is sold along with the drywall supplies, typically labeled with anywhere from 5-20-45-90 drying times. The ratio varies depending on how closely I pay attention, but it's probably around 3 parts compound-to-1 part grout.
 |
| The Local tied down for beans at Kemper, Missouri. |
In a few hours, I carved out the flangeways and sharpened the shoulders, then gave everything, including the styrene sidewalks, a wash of black/brown India ink. The turnout complicated things but I'm content with how everything looks for now.