Showing posts with label railroad. Show all posts

Monday, November 23, 2020

BARGE II

 Quick update

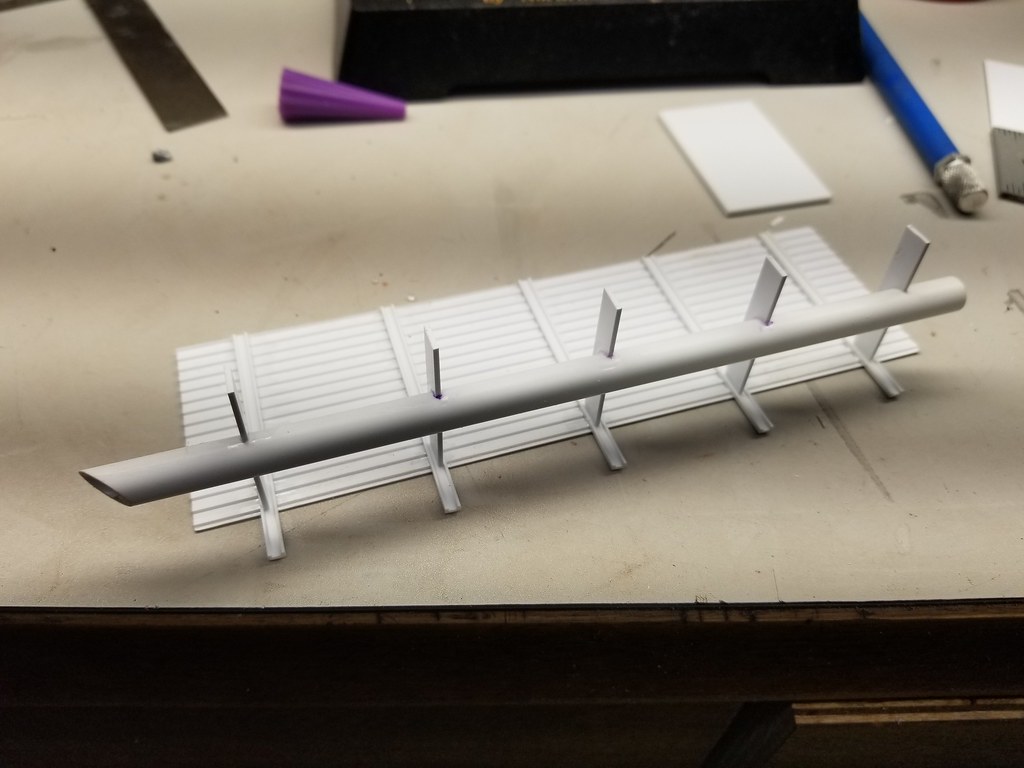
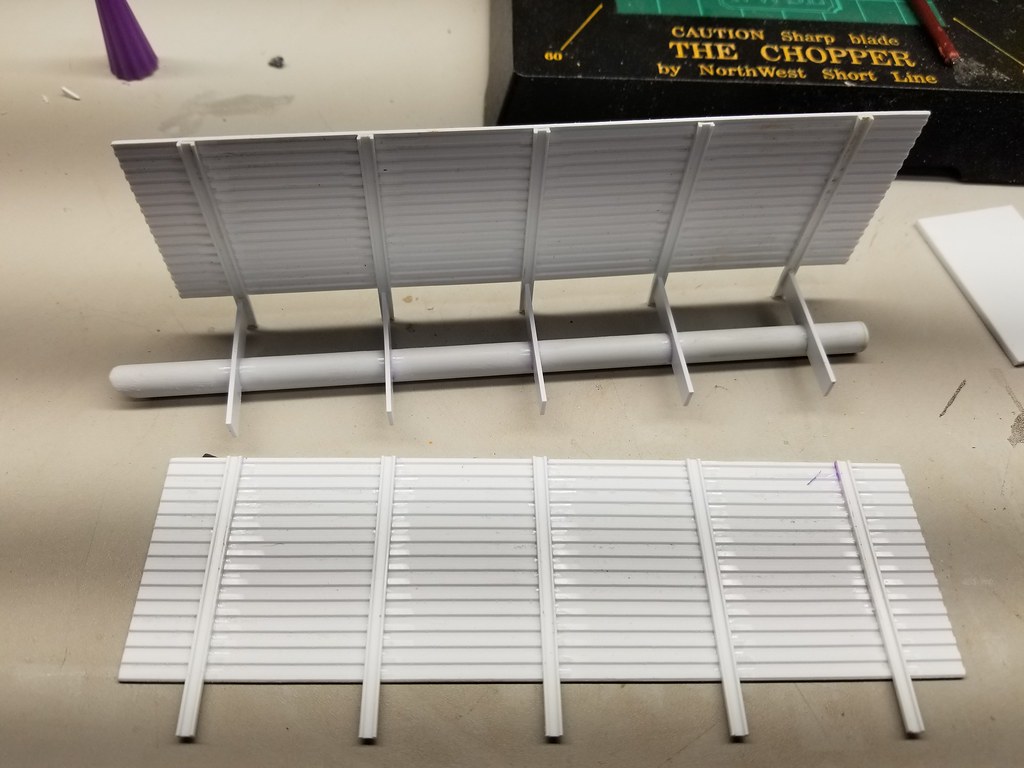
The second CMR barge is taking shape and as the photo shows, I'm making the full 110' length model. All parts were cut from their sprues, sanded, and laid out on the bench for a test run. The exterior braces are not shown (68 total), as well as the four interior lateral bases. They can be seen in last week's update, should anyone be interested.

    
Dry run
 

And of course, I ran out of solvent before she was done. I was using SciGrip 4, but rather than filling up the needle-tipped bottle, I switched application methods and used a small brush which allowed more control over the amount I was using. I placed an order for SciGrip 3 (which reaches 80% strength in 24 hours instead of 72 hours), plus a medium-bodied tube of solvent for comparison. Assembly will continue as soon as they arrive.


Solvent

Wednesday, November 18, 2020

NOVEMBER PROGRESS REPORT


BULK COMMODITIES

In accordance with the railroad's theme as a cog in the Nation's Basic Materials & Primary sectors, barges and a towboat were deemed an appropriate addition to my river-rail transload operation. I did some internet searching and found laser-cut acrylic kits offered by Custom Model Railroads. After browsing and getting distracted by all of their other cool stuff like skyscrapers and lift bridges, a barge 3-pack and towboat was purchased.

It has taken me a long time getting to this point, mostly due to a bit of intimidation. These kits are more advanced than what I typically build and are made of acrylic, an unfamiliar material. As such, I let the project fester on the shelf since delivery, paralyzed by analysis. I already had the real estate picked out and riverfront partially landscaped, so I finally forced myself to flip through the directions and dive in.

One barge has been assembled thus far but the other two should go a bit quicker after familiarizing myself with the multitude of parts, and working with acrylic solvent from a needle-tipped bottle. Filling and sanding the interior bracing pockets was slightly tedious, so they'll be hidden with coal or aggregate loads on the remaining two kits. Overall, I've gained some confidence with these acrylic kits and look forward to beginning construction on the tow boat. I'm considering ordering their double track lift bridge for the next layout, too...

The instructions are well written (and give scale to the kit) 
"Fiberglass" covers are provided, molded out of white styrene

Squadron putty applied and sanded smooth, per the instructions

An overview. Deck bracing is optional if a load or covers are added. I think the next two will be loaded...

Deck details still need to be applied    

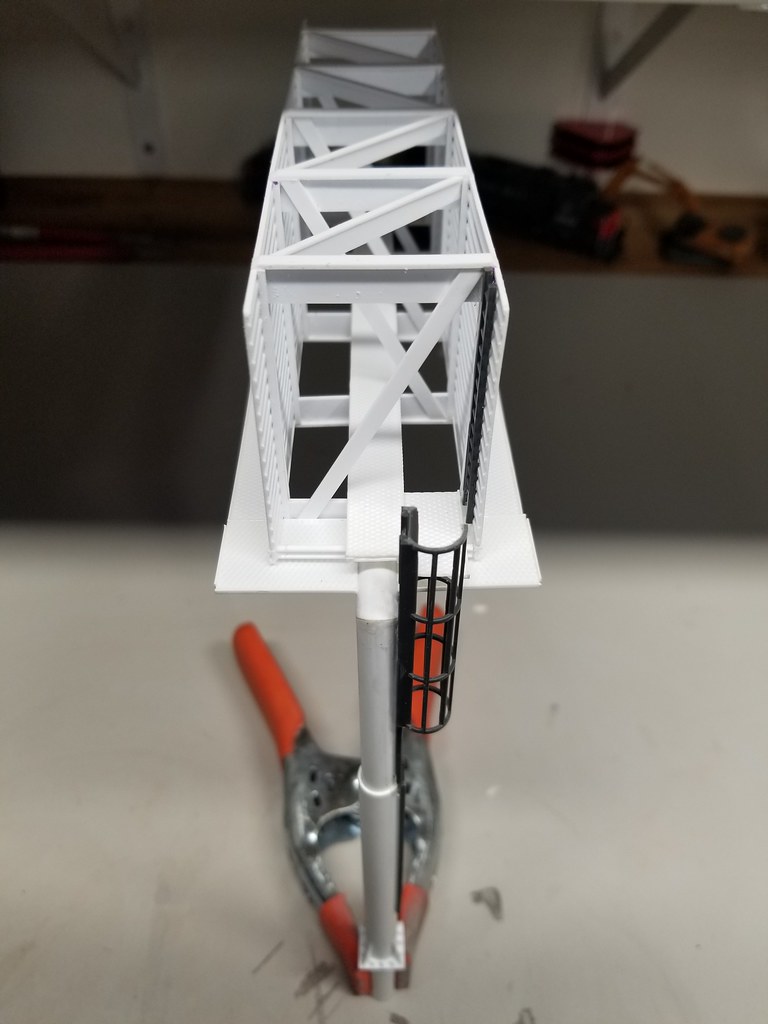
CMR's double track bridge, nearly 47" in length

MODELING A.D.D.

The second project is a pair of EMD SD45s that have been in progress for about two years, which were originally painted for the C&NW. With the latest and greatest SD45s available from Scaletrains, I don't know why I'm still heading down this path, but I digress. The hardest part was stripping Kato's paint but the 91% eventually did its job, and details were then added. ESU Loksound decoders with proper 20-cylinder sound files are installed, along with dual sugar cube speakers. Eventually they'll get a paint job and LED lighting. 

I have not made a decision about the handrails yet, as we all know the standard KATO parts are a bit chunky. I may order the etched variety from KV models or go another route with parts already on hand, i.e. Athearn metal parts. Sure, they're not as detailed, but from afar they look decent to my eyes. We'll see how much motivation I find.

The snow shields and air conditioner are why I like freelanced modeling: I added them because they look cool. There's a GP35 that will go along with these two which is in the same condition, but she's hidden away in the modeling closet. All three show various aftermarket modifications such as anti-climbers, relocated horns and headlights, along with an ECAFB* that hints at electrical upgrades, but under the hood they still retain 20-cylinder prime movers. 

*Electrical Cabinet Air Filter Box, typically a sign of dash-2 electronics. It's on the left side walkway behind the cab.

Moderately modified by CMPS but the 20-cyl is still under the hood. AS IT SHOULD BE.

Freelanced 20-cylinder rebuilds. Maybe SD45M-2?

Thanks for reading and I'll have some photos of the tow boat for the next update.


Saturday, October 24, 2020

A MOSTLY-FINISHED PROJECT

YOU'LL SHOOT YOUR EYE OUT! 

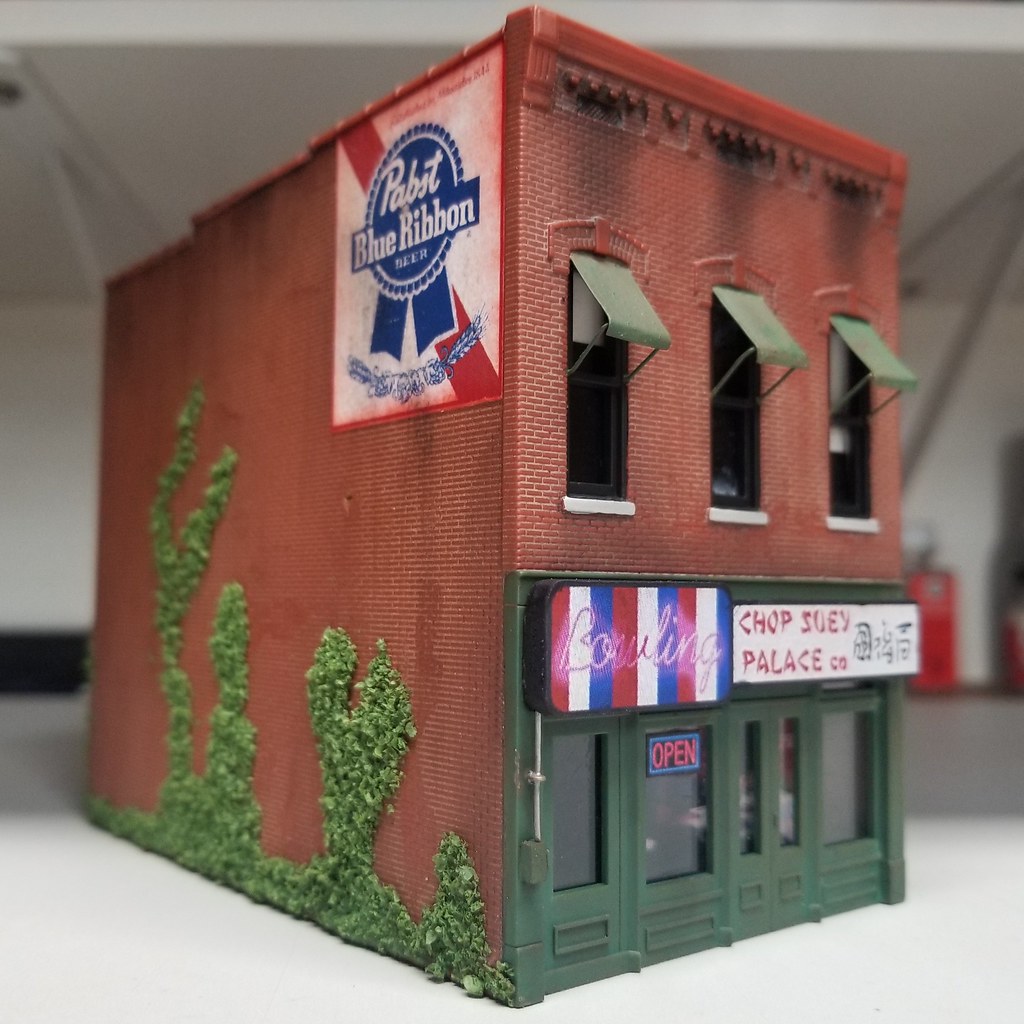
It took me a few weeks but I managed to push out another local business for the town of Kemper, Missouri, using the Old Indian Tobacco Shop from the Smalltown USA line by Rix Products. Because the kit is intended to sit between other buildings, there are no windows on either side but she sits between a main line/siding and a junkyard spur, so I doubt that the occupants would have much of a view anyway. 


The building was assembled using standard techniques and my favorite solvent, MEK, which is available by the quart and is far cheaper than the equivalent products from the hobby shop.  Squadron putty was used to do a sort of "plastering" effect over the brick on the right side, then lightly sanded to bring out the brick texture beneath. I used the as-molded colors as well due to laziness, only painting a few window frames and the awnings plus a wash of Robert's brick mortar. Miscellaneous details were applied to the front and rear for a bit of interest: heavy paper and wire awnings, downspouts made from scrap styrene and wire brackets, as well as the PABST advertisement and the Thomas Hart Benton mural on the right side-The Wreck of the ole' 97. I came across the piece while googling "American artists" or some such and figured it would look right at home in a small, old railroad town. Weathering powders were added and sealed with Model Master flat from a spray can, then glazing was installed.


The mural and beer logo were both printed on regular paper and sprayed with Krylon rattle-can matte finish. Once dry, they were sanded thin and affixed with diluted Mod Podge. The signage out front was simply printed out on heavier gloss paper and applied to a scrap of Sintra*, which is another new favorite modeling material. Unfortunately, the only local art shop that I knew of who carried it fell victim to the rioting and looters of Chicago. Amazon gets more of my money now, I guess.

*from the intranet: Sintra is the brand name for the high-quality PVC board, that is specifically made of moderately expanded closed-cell polyvinyl chloride, better known as PVC, in a homogenous sheet. The board is made from a lightweight material with a low gloss matte finish.


The business was obviously inspired by the movie A Christmas Story, a family favorite, and while my model railroad is not located in Hohman, Indiana (and not during winter), I used some modeler's liberty and created my own 1/87 ode to Jean Shepherd's tale anyway.


The interior is virtually unnoticeable when placed in town but I thought it would be funny to add, so once again I turned to the internet for some research. I found the scene and copied/pasted it into MS Word so I could get it sized properly, or at least close enough. The image was printed and glued to a scrap of Sintra, then installed about a half-inch from the front windows. If it were not for my impatience, I could have built an interior complete with figures and lighting but again, considering the law of diminishing returns and the building's location, this was a reasonable compromise in my mind.

I wanted to add electrical service details to the rear of the building but I couldn't find the meters that I know I have SOMEWHERE, so I stuck on a scrap box exhaust fan for the kitchen and another awning built from scrap styrene. The creeping vines are leaves from Scenic Express applied over randomly-dabbled tacky glue. 

RENAMING THE BLOG 

I finally began to ponder how to accurately describe my model railroad, as "CMPS" didn't really match what I'm doing on the blog. As such, I have updated the blog's title and description to reflect this fact and hopefully it seems less convoluted than it was before. I ran out of room in the description, so I'd like to also add that Consolidated Motive Power Services still exists as an on-line customer and also on my workbench. CMPS is something I started years ago to give a name and "official" feel to the work I did for other modelers: paint, DCC, lighting, mechanical upgrades, etc. I may start it up again, depending on my amount of free time. For right now, they exist solely within the (fictional) town of Clemens, Missouri and continue to provide all sorts of locomotive and heavy diesel repair, rebuild and refurbishing services.

So, back to the railroad...

Not being a graphic designer, the best I can do right now is to cobble together some sort of corporate identity using internet resources and MS Word and Paint. I was able to download an Illinois Central-type font that included their modern logos, so I brainstormed a bit and created the example noted below. 

The River Basin still maintains the IC's "Death Star" logo as well as operations over spun-off trackage in Illinois and Missouri. Yeah, we'll have to suspend all belief to get the IC into Missouri but oh well...the next rendition will be "more accurate". I've drawn scenic and architectural inspiration from all the old river towns like Quincy, Dubuque, Galena, and St. Louis so that's the general idea: bluffs, greenery, curves, old brick buildings and nitty-gritty industrial scenes, oh and plenty of EMD power too. I may eventually have a professional graphic artist take a run at the artwork but for now, it seems like a good fit for a regional Carrier that is only concerned with the bottom line.


Friday, August 14, 2020

URBAN PROGRESS

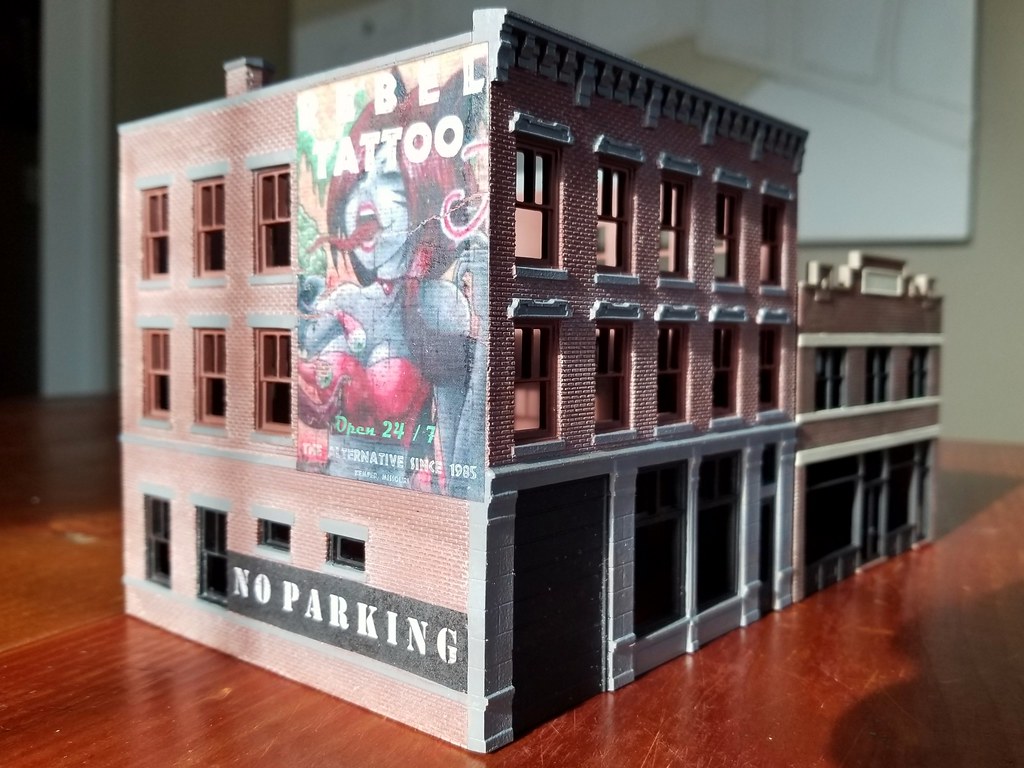
There's been some progress around Kemper lately, mostly concerning the tattoo parlor and the Industrial Avenue area. Rebel Tattoo is basically finished after I added awnings, weathering, graffiti, black cardboard interior blocking, and electrical service. Being the perpetual 12-year old that I am, I couldn't resist adding my own off-color "artwork" as well, in addition to two murals of some television/film icons. The only thing left is some weeds and dirt to "plant" it onto the layout.


The awnings were simply folded out of heavyweight paper, then glued to the structure with CA, while the power conduits were some slightly oversized wire with brass brackets mounted to the building. Downspouts were made with styrene rod held the same way. Because my layout is so high by design, the roof didn't get much detailing other than an access hatch. I had to finally say it's "good enough" otherwise this thing would have toilets and running water...

 
Heading into town on Industrial Avenue will give you a glimpse of some other creative graffiti that adorns this prime bit of real estate. I tried to recreate what I spotted in an urban exploration video, but of course, the original is a little bit spookier than mine. 
 
And finally, I had a chance to sit down and build something that I've had taking up space in my head for a month. No plans used other than the basic 14'x48' dimensions, plus standard styrene shapes and patterns that I had available.


Finished with rattle can brown primer and Tamiya semi-gloss. The graphics were laid out using MS Word, then glued to the billboard with contact adhesive.
 
For those pedantic individuals at home, this is officially termed a "Full Flag, Back to back"-type advertising structure. WATKINS is also a legitimate marketing firm in Missouri, for geographic accuracy!


(Note: The intersection is real, but everything else is fictional)
 
 
I fumbled a bit on one of these billboards, but I won't say which one. I'm sure there's a prototype for it somewhere, though!

Maybe I'll move on to some rolling stock or locomotive projects by the next update...

Tuesday, June 23, 2020

OK YOU CHOO CHOO BOIS

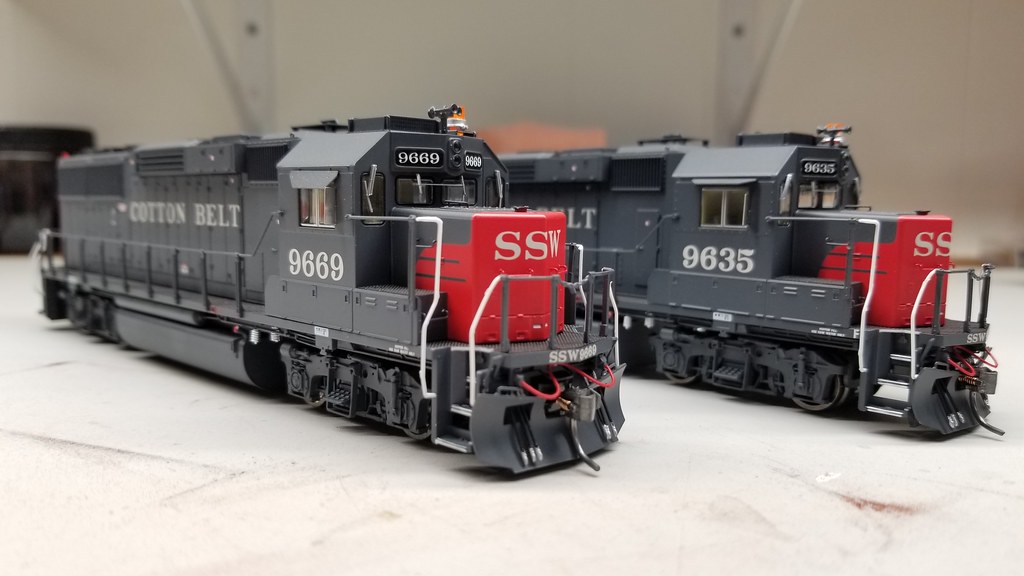
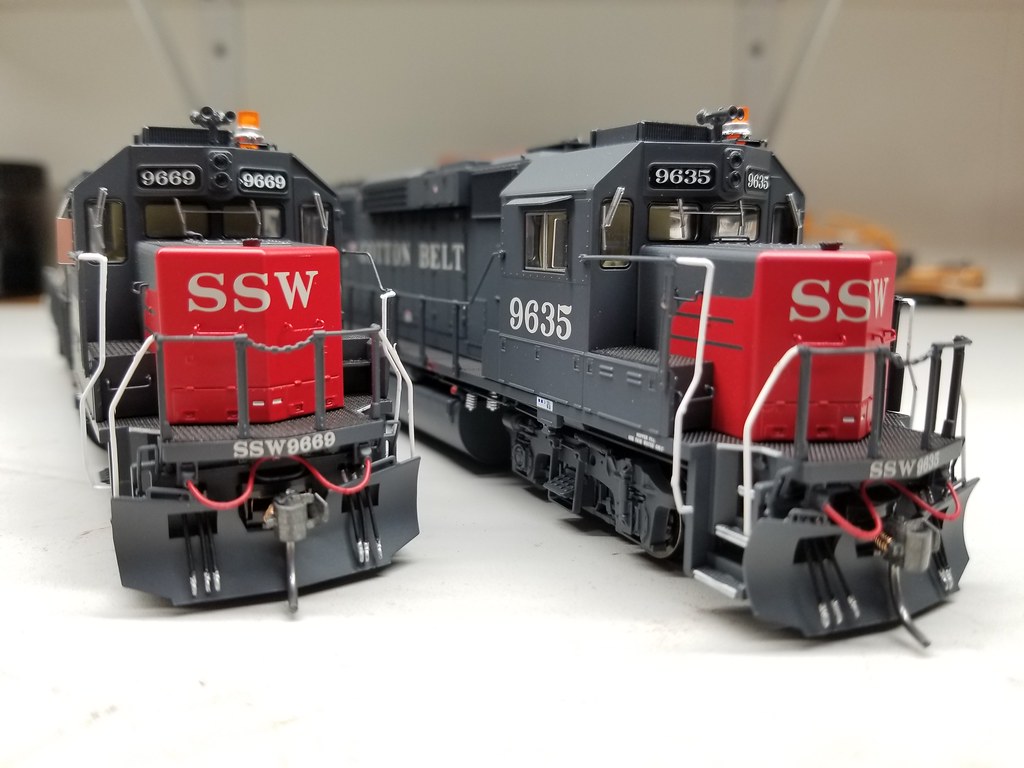
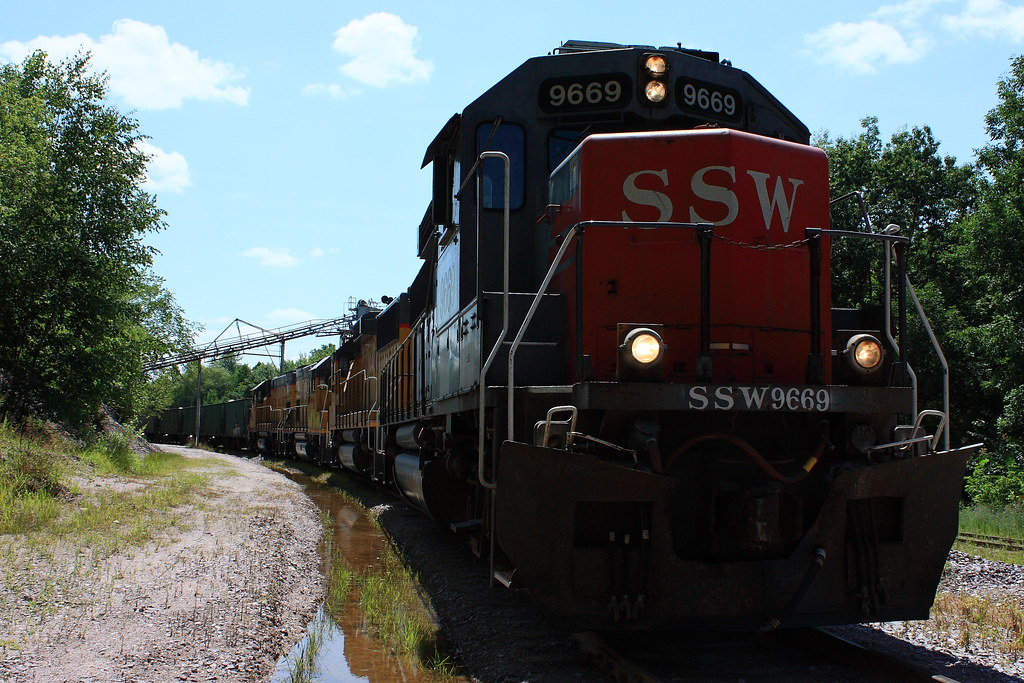
Trainworld had Fox Valley GP60s on sale a couple of weeks ago so I dusted off the wallet and snatched up a pair for $100 each-with ESU Loksound! The 9669 was specifically chosen because it led the first rock train I worked as an Engineer. I figured they'll look better as a pair so I also purchased the 9635...


Both will most likely receive updating to an early-2000s appearance, so I'll have to relocate the horns, remove the beacons and install LED ditch lights. The 9669 also had goofy gray patches all over her for whatever reason, so I'll probably add that too. I will not be adding the stupid yellow stripes that UP did, however. 

Anyways, enjoy the photos.


Thursday, May 21, 2020

WELCOME TO KEMPER

Over the past couple months, I managed to get some work done on an area that's been a dead spot of sorts on the railroad. My track plan is basically a figure-8/shelf design with two duck-unders for the turnback loops, so this area was always a little bit harder to work on. Even with using a stepladder I knew it would be a pain. 

Anyways, here's what I've done so far for the (fictional) town of Kemper, Missouri.


REBEL TATTOO front w/ mural


The large awning was printed on paper as well, then folded and glued to the structure. I've added awnings to some windows but I still need to add downspouts and a few other details before I add final weathering. More pictures to follow...

 
REBEL signage


The tattoo parlor's signage was made using two different methods. "Zombie Girl" above and including NO PARKING were printed on paper using my Laserjet. The paper was then moistened with my fingertip and rubbed away until the image was nearly transparent, then applied with thinned white glue. I don't think I've added any matte finish yet and I'm not too disappointed with how she turned out. There is a slight crack in the paper but it's barely noticeable.


The murals and advertisements pictured above of the "amorous ladies", "Cutty Sark Whisky" and "Bombs Away" were printed on actual decal paper using my Laserjet, then coated with decal film from Microscale and applied as usual. Before printing, I  adjusted the transparency on the Cutty Sark advertisement to give it an aged look, too. Weathering will probably tie everything together. I think I'd have a lot of fun in this part of town...

ROAD CONSTRUCTION AHEAD!
How else would they get to the tattoo parlor?

As seen below, this is part of the Kemper Industrial District so I'm trying to get that grungy, industrial look.


"Street View"


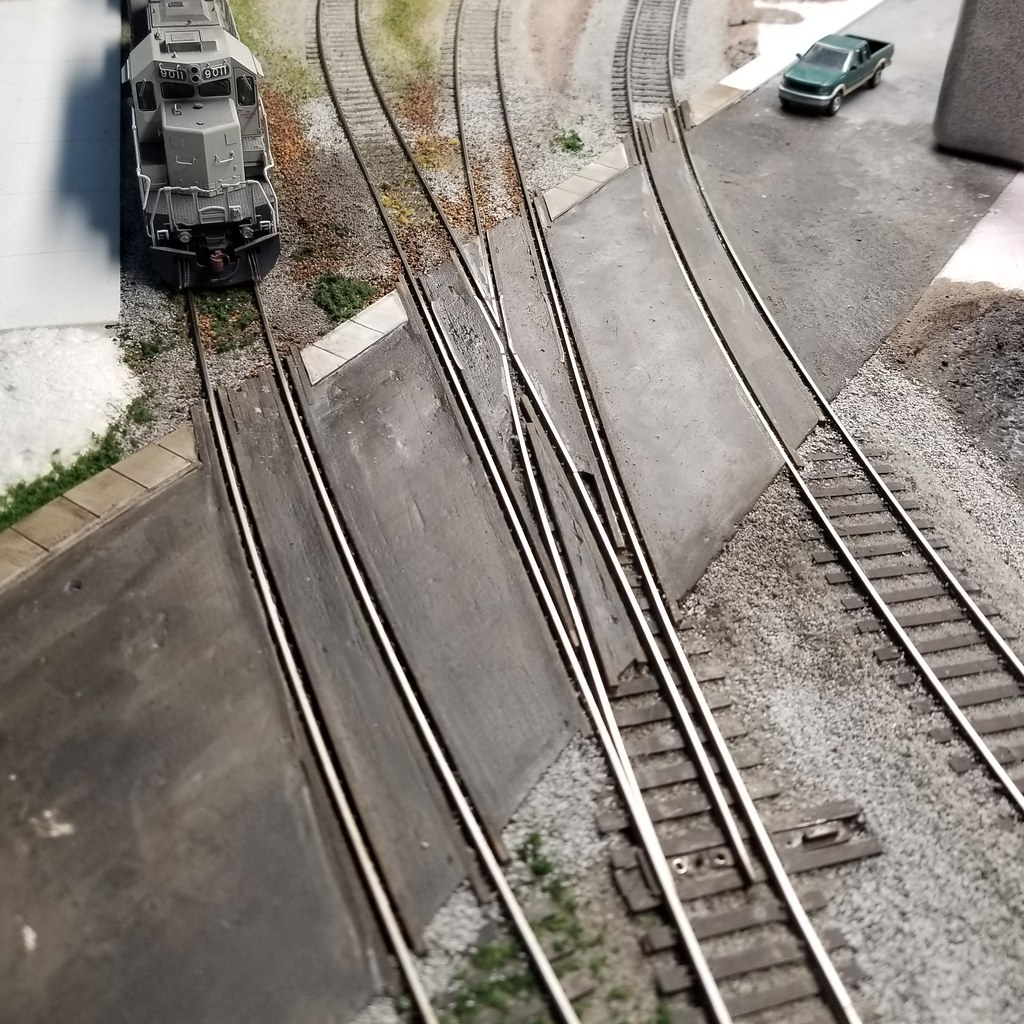
The pavement is my own blend of setting-type compound (45 minute) and black unsanded tile grout, using 1/16" basswood to form flangeways. I DO NOT use joint compound because of the excessive drying time, so this stuff is sold along with the drywall supplies, typically labeled with anywhere from 5-20-45-90 drying times. The ratio varies depending on how closely I pay attention, but it's probably around 3 parts compound-to-1 part grout.


The Local tied down for beans at Kemper, Missouri.

In a few hours, I carved out the flangeways and sharpened the shoulders, then gave everything, including the styrene sidewalks, a wash of black/brown India ink. The turnout complicated things but I'm content with how everything looks for now.


Sunday, February 16, 2020

LAST TRAIN ACROSS CANADA

I finally digitized one of the documentaries from my childhood even though I'm sure that an ***official*** VHS or DVD copy exists somewhere, but I've had this tape since I was a kid. 

Back then I primarily enjoyed the railroad content but now as an adult, the North American cultural and political discussions are interesting and thought-provoking as well. Plus you can't beat those old scenes of steam-heated passenger equipment...

Last Train Across Canada w/ Murray Sayle, part I


Last Train Across Canada w/ Murray Sayle, part II


The audio isn't the greatest and there are  copyright claims for the music, but so far YouTube has not taken it down. I'm not interesting in monetization in any way because I wanted to post this for the educational, historical and cultural value. 

Oh yeah, my channel has some other model railroading stuff on it too.

Saturday, February 1, 2020

SCRAP YARD

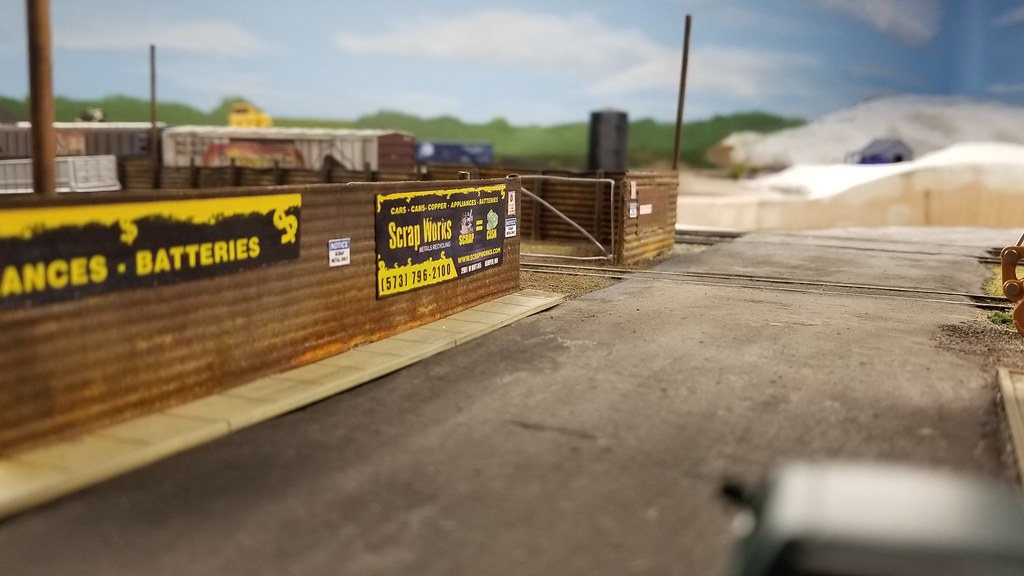
I don't have much time for writing, so here's a few pictures of the local scrap yard. 


In the interest of economics, I decided to attempt the rusty, junky look using sawdust and washes of India ink. The piles are still drying, so the scene isn't completely done yet...I may add some more "rust" effects and junk laying around too. 


The signage was simply printed on glossy paper I had in the stash, then cut out and glued to the fencing with some brand of tacky glue. It seems like "SCRAP WORKS" is a real business, but I went into MS Word and added a Missouri area code and fake address to give a sense of place.


The rusted, beaten-up walls were created with self-adhesive insulation tape that I embossed on a sheet of styrene, using the end of a paint brush. A million-dollar project, for sure!


Oh yeah, the ground and scrap yard walls were weathered using a "rust" solution and paint sold by Modern Masters. I think I got the idea from Jim at JSSX, who used it to beat up some gondolas, if I remember correctly...

The last photo I've got right now is the material handler I found on Amazon for about $12...so I bought three! They came with a magnet too but the chains they used don't really let them hang properly, so I've got the clamshell in use right now until I can modify those parts. This guy was weathered with a spray of Testor's clear flat (protecting the windows with Micro Mask), then shot with an India ink wash out of a small pump bottle. Probably a little too heavy, but that's fine. It's in a junkyard after all.  


Friday, January 3, 2020

AMTRAK!

I can't decide on a posting schedule so I said "self, just do it when you feel like it".

"Intrastate"
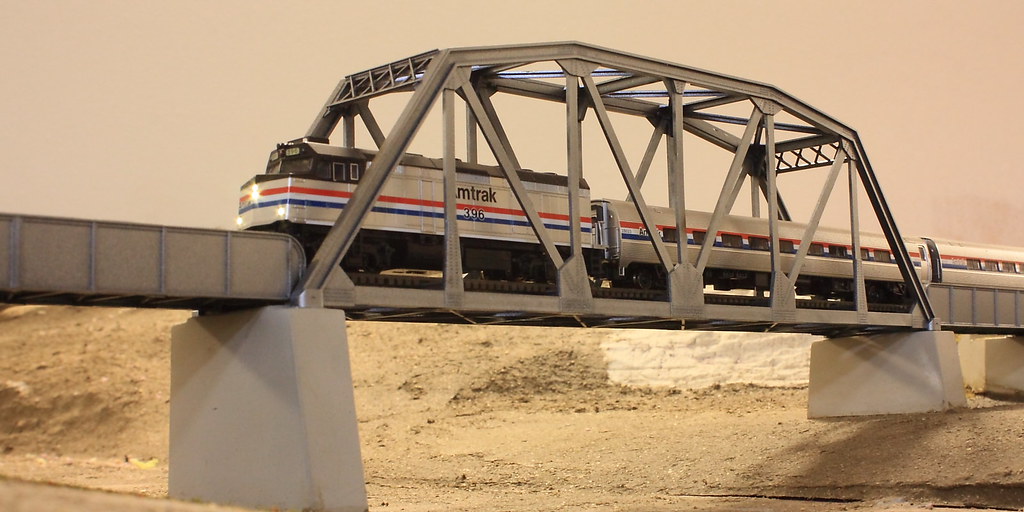
Amtrak train #369 putting along southbound towards Clemens. Scene loosely inspired by the Dubuque Tunnel.

Astute observers will note the odd combination of a locomotive and NPCU on the head-end, also Amtrak jargon for "non-powered-control unit". This will be totally SHOCKING, but this is due to a bad ordered m/u cable in the train set. The crew will have to run around the equipment before going north on their next tour of duty, which I'm sure they're very happy about doing! I might rename this the "Algonquin" since I forgot about that name until I looked at my older photos. Those Rapido units still need to receive some road grime and battle scars to really look the part, and I might also try and upgrade the LEDs to make them brighter since they do seem a bit dim out of the box. Yes, I have looked at the CV values using the Lokprogrammer...

"Algonquin"
 Amtrak train #359, the "Algonquin"

The first layout I built in our new home was short lived and N scale too, so these photos are a few years old. I made too many mistakes during the planning and construction (built too low, bad lighting, scenery too deep, etc) so it got torn down. 

"Bluffs, IL"

AMTK 396 leads train #359 into Bluffs, IL

The decision pushed me to sell off most of my N-scale equipment to fund a move to HO scale. The amount of detail parts and accessories, plus the DCC sound/lighting opportunities were just too much to pass up. Giving up the sort of space available in N scale was tough, but I've gotten used to it now. It seems like less is more, plus the time that can now go into detailing individual scenes and structures (still large enough to get noticed) in HO scale more than makes up for it.
That lone Superliner is over 1300 scale feet from the head end.


That's about it for now and since I did save most of this Amtrak equipment, maybe there is hope again for another N scale layout in the future...